
Shot on RED Gemini 5K
Just wrapped up this spot, featuring our good friend / model / athlete Eden Hoogveld, again - riding atop the latest release of the RED Gemini 5K camera. Our concept this time was a fairly straightforward. A one minute spot, showcasing our talent and the great tasting Protein 2o water. With this in mind, I wanted to create an epic feel that was also gritty and heroic. For a while now, I have been looking for just the right project to collaborate with our talent (back in from LA), and this project was perfect! Also, before I get too far into this post, I want to give a a special shout out to my buddy Don Sisson for all the great behind the scenes photos he took during our shoot. Thanks Don!
Audio Voiceover Work
We started off the project with a very simple script, and brought Eden into the audio suite to record a few lines. She pretty much nailed it in as few as four or five takes, and I love how it turned out once we cut it together with our audio bed. This is actually where the entire project started, which is a GREAT way to work for me personally. After hearing the VO and audio pacing come together, I was able to plan out our shot list and then being to think visually about putting together all the pieces. This is 100% backwards from the way I’ve worked in the past. Typically I get all of the visuals out of the way first, and then deal with audio near the end of the process. I really liked doing it this way, and can definitely see myself applying this logic to many other projects down the road. (All the audio was edited in Adobe Audition using their multi-track feature). Once it was assembled, I output an entirely new track that we could ingest into Premier Pro.


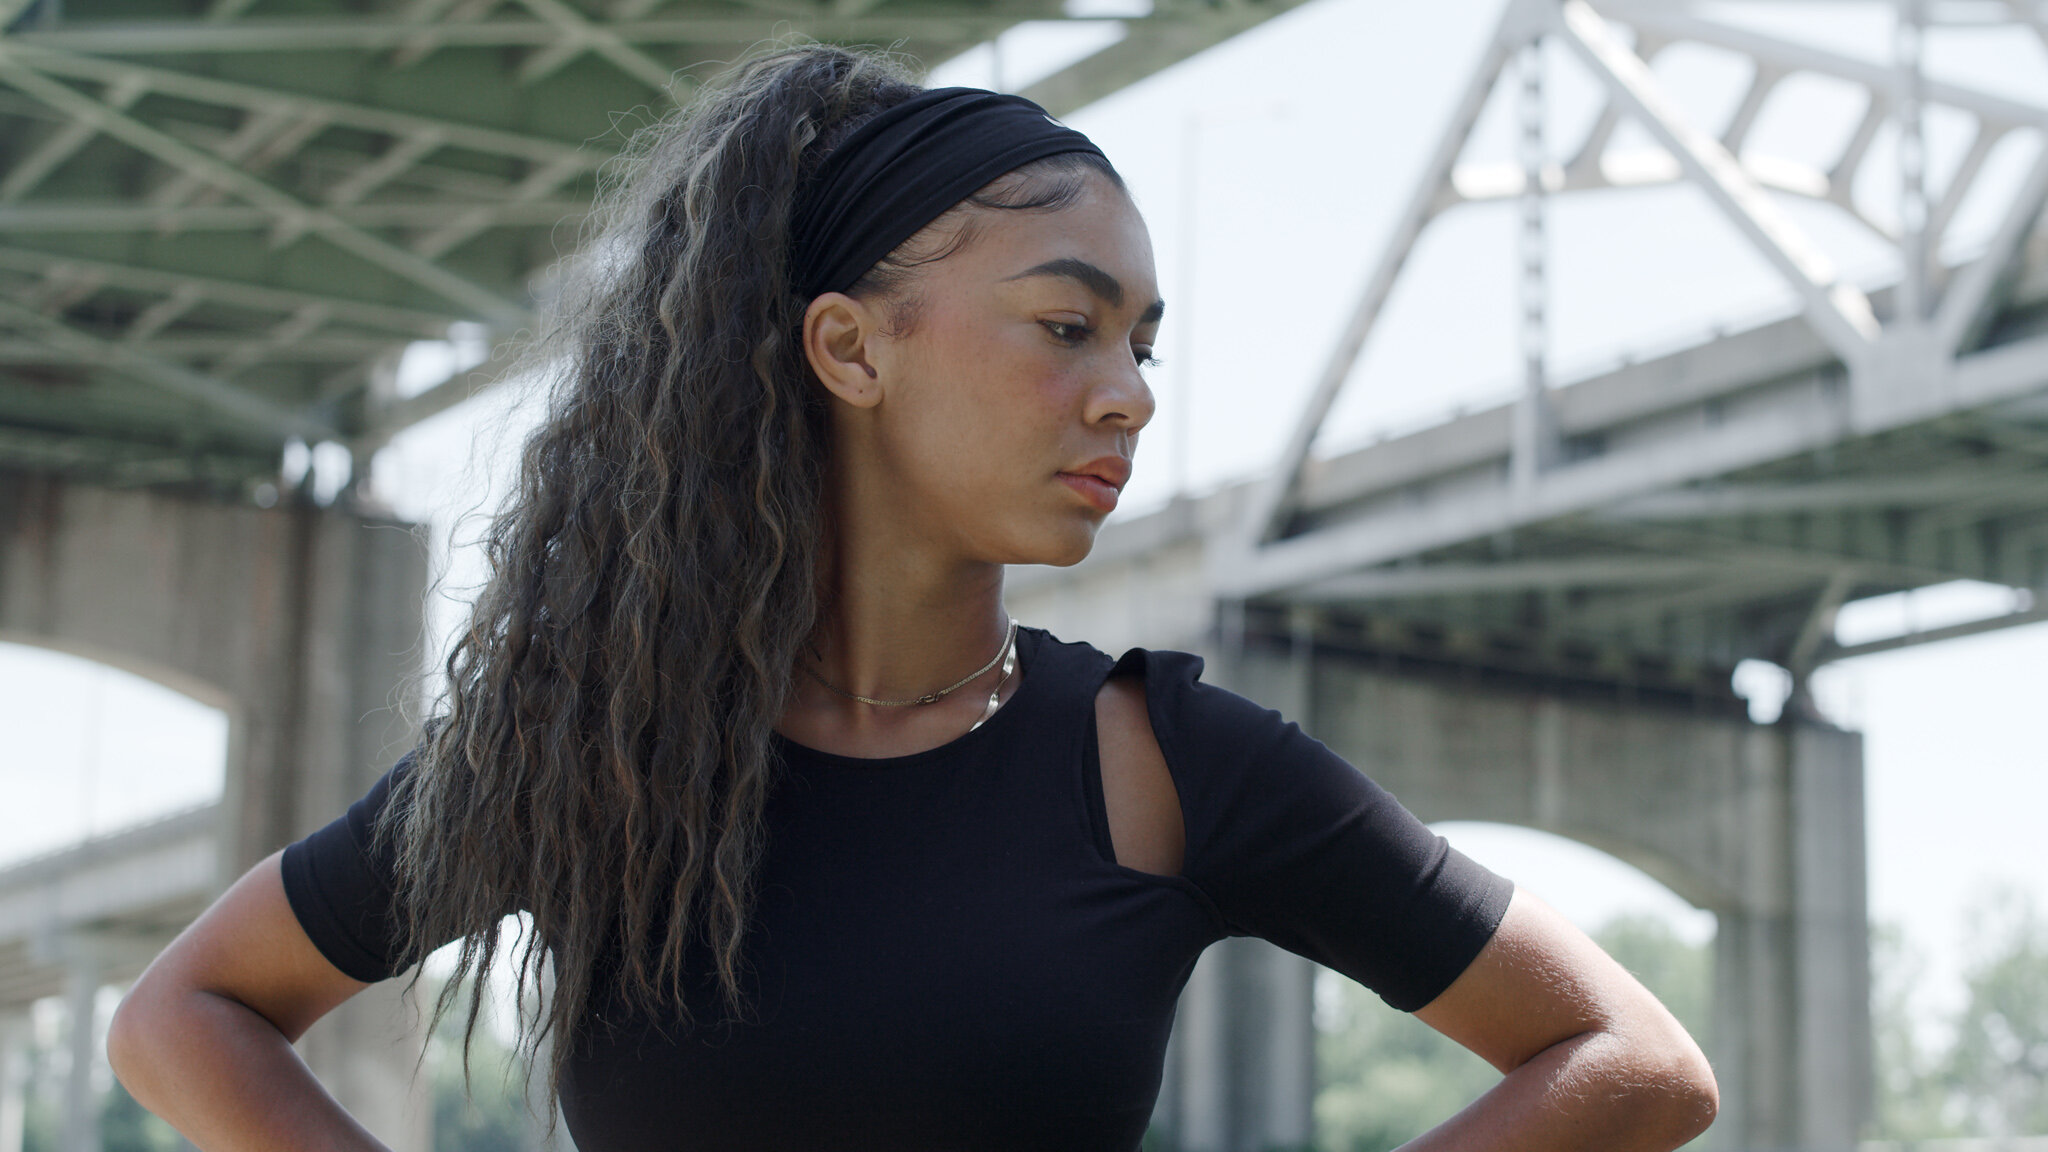
Still frame cropped from the S35 Gemini sensor


As for the 5K format size again, I’m still loving it. The form factor and features have so many potential applications in the work I do. Shallow depth of field, wide FOV possibilities, a wide variety of glass options, etc… and editing the footage on my Mac is pretty much a breeze.
Camera Settings, Support and Miscellaneous Tools


Nearly all of this project was shot at 5K, 24 fps and a few 60 fps, REDCODE RAW 8:1 (RED's compressed RAW format). This project was a 1-day shoot, in a variety of locations. I certainly didn’t overshoot footage this time around as to not tax Eden. If anything I undershot. That said, it’s ALWAYS important to remember the talent when shooting athletic work. Asking them to repeat the same movement over and over can be challenging even for the most fit. It’s easy to get lost in the technical bits and pieces behind the camera, so don’t forget about your talent. Give them lots of breaks, and bring snacks and water to drink.

Using my trusty Yakima Big Stack I strapped down a 6 foot step ladder (yep, it works for more than just Kayaks) … but as I found out through social media they don’t “endorse” my method, yet credited me with being a creative problem solver. Anyway, brought the ladder along for shooting high angles but we ended up not needing it. Everything else was pretty simple. Packing a single full apple, 1 C-Stand, some sand bags, my production bag full of odds and ends, and our 4x6 Sunbounce … we were off and running.
Scouting our locations
Just days before our shoot I ran around like a crazy person looking for locations. Fortunately I found four or five spots that I thought might work nicely to show Eden working out. I pretty much alway grab some iPhone shots of those locations to put into our call sheet, or simply as reference photos to help with planning and producing the project. I also use a pretty cool tool called Photo Pills which is great for planning a shoot. I typically use the AR feature for tracking the sun path which helps me figure out when to shoot at each location.

IDX and Indi-Pro V-Mount Batteries worked very well, giving us long lasting power, lightweight, and good form factor.
Each brick gave me plenty of uptime, and I’ve gotten into the habit of leaving the camera powered up at all times. The rebooting process takes a while, and when we’re trying to grab shots quickly it really helps to save time on set by not waiting for a camera to power on and off. I think I might have only used 3 bricks over the course of the day.
Still rollin’ with those Rokinon Primes
As I mentioned in my previous post, I'm pretty new to the world of RED Cinema, and I don't have an unlimited budget for gear. This spot was self produced, and being an owner/operator, I've gone with a small set of Rokinon cinema lenses which so far I’ve been impressed with. I need to do some more extensive testing however, and put them up against some higher end cinema glass in the future. Even using the Rokinon glass, which is VERY affordable, this camera yields a crazy sharp image! This shot was achieved using the Rokinon 50mm f/1.5 prime lens.
My Go-To Rokinon 50mm f/1.5 prime lens
The goal again, was to shoot the vast majority at f/2.8 to f/5.6. We started shooting early in the morning, beginning with warm up stretches and some light running shots. The light was pretty consistent, but moved very quickly in terms of lux. We only used one additional source which was the California Sunbounce 4x6 frame to fill in a bit. The Gemini did a great job again, and I always make sure our color temperature is as close in camera as possible, making grading a bit easier.


RED Gemini quick set up with our Rhino Slider
I’ve been totally happy with the size, weight, and form factor of this camera and it really works nicely on my old trusty Rhino slider for a small and compact setup that’s easy to move.

Every setup was lit with available light, and a combination of the California Sunbounce 4x6 frame
Lighting was from one extreme to the other. Gorgeous and soft morning light, to midday Sun with harsh shadows. We didn’t have the budget, time, or the man power to modify the light much, so the lightweight Sunbounce was our best bet. We could move quickly and easily and get some nice frames. It would have been killer to go full on with some major lighting setups, but again we just didn’t have the budget or time, and I think using raw light gave us that gritty / documentary look I was going for anyway.

Looking for f/2.8 - f/5.6 wasn’t tough at all. Tracking my subject gave me some challenges, but I think we came away with some really good results.
Image Quality
I mentioned this before, but I really do love that Adobe Premiere Pro CC that supports RED .R3D files natively without having to install any other software. This project was only a 1-day shoot but it is still nice to know that I can cut the footage right inside the app. Right now my flow is to still edit the .R3Ds natively in REDCINE-X Pro for mostly color balance, exposure, and contrast. Then jumping over into Premiere Pro for cutting and running into very few problems with the files. 1/8th playback is still my go-to, for time-sensitive cuts, 1/4 for QC related work, Full Resolution when paused for color and focus critical work.

Gitzo Flexibility
I’ve gone back and forth on this issue using several different types of support. From traditional video tripods to still photography tripods. I still find myself loving and always coming back to the Gitzo sticks for getting those angles that I JUST CAN’T GET with other systems. It’s lightweight, but incredibly strong and will give me a working height of nearly 9 feet in the air, to just inches above the ground. That kind of flexibility in a run and gun scenario is tough to beat in my opinion.


More BTS
Here we are working in a couple different locations getting a slider shot while showcasing the product, and then below, a stretching shot with the amazing cotton-wood elements blowing through our scene. I couldn’t have planned or produced it better if I tried! Totally magical.

An amazing feature that I still love about working with motion cameras from today, is the ability to pull stills for the video with dang good quality. Off of the 5K S35, I’m getting 15.4 Megapixels, exporting out 16-bit TIFF files that are good looking images. This could produce a beautiful 9x16 inch print (without interpolation) at 300 DPI for each frame, though I’ve yet to print anything from them. The potential is exciting, and I can’t wait until I have the time set aside to do some printing for these stills.
Final Thoughts
I love this camera, plain and simple. It’s so easy to use, yet offers MASSIVE pro features and amazing quality right at your fingertips. Eden knocked it out of the park on this one, and Don was a tremendous help on set. Thank you both for your work!
I hope you enjoyed this little blurb, and thanks again for reading!
TRAVIS DUNCAN | ADVERTISING PHOTOGRAPHER BASED IN THE MIDWEST. SPECIALIZING IN: PRODUCTS & ARCHITECTURAL PHOTOGRAPHY, and VIDEO PRODUCTIONS.
Travis Duncan Photography | Advertising • Corporate • Motion
Web - www.travisduncan.com
Studio - 573-893-9917